Sidebar
Table of Contents
23.4.2.9 Component gb.image.imlib
The Image class of the gb.image.imlib component adds image processing methods from the imlib2 library to the Image class in the gb.image component and thus extends its methods.
23.4.2.9.1 Methods
The Image class in the gb.image.imlib component has these methods:
| Method | Return type | Description |
|---|---|---|
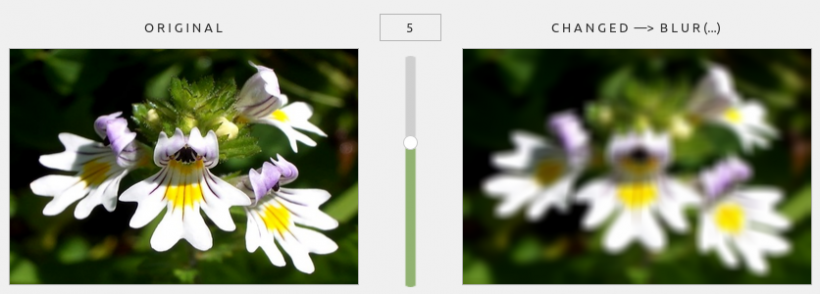
| Blur ( [ Radius As Integer ] ) | Image | Creates a blurred copy of the image and returns it. Radius (positive, unit pixels) is the radius of the blur. A radius of 0 has no effect, 1 and more determine the radius of the blur matrix, which determines how much the image is blurred. |
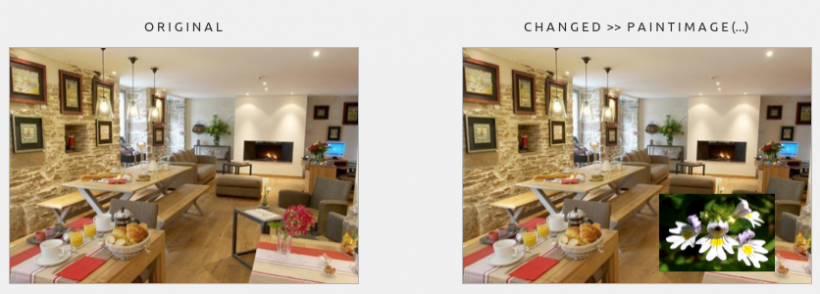
| PaintImage ( Image As Image [ , X As Integer, Y As Integer, Width As Integer, Height As Integer, SrcX As Integer, SrcY As Integer, SrcWidth As Integer, SrcHeight As Integer ] ) | - | Fades an image into the current image. X, Y are the target coordinates of the drawing. By default, this is the origin of the current image. Width, Height are the dimensions of the copy. |
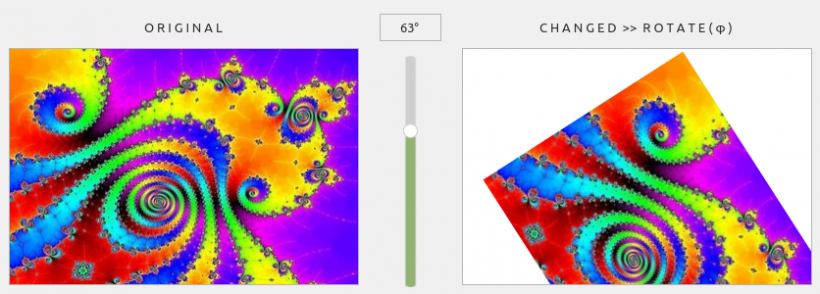
| Rotate ( Angle As Float ) | Image | Returns a rotated copy of the image. |
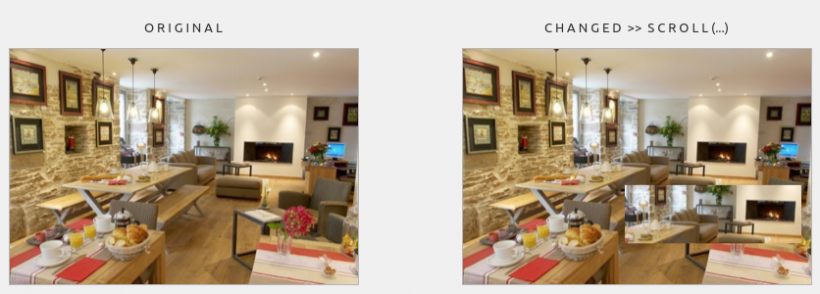
| Scroll ( DX As Integer, DY As Integer [ , X As Integer, Y As Integer, Width As Integer, Height As Integer ] ) | - | Scrolls a rectangle of size (width, height) at the position (X, Y) within the current image by the distance (DX, DY) in pixels. DX is the distance along the X coordinate. DY is the distance along the y-coordinate. X is the upper left x-coordinate of the rectangle. Y is the upper left y-coordinate of the rectangle. Width is the width of the rectangle. Height is the height of the rectangle. If the last four arguments are not specified, the entire image is scrolled. |
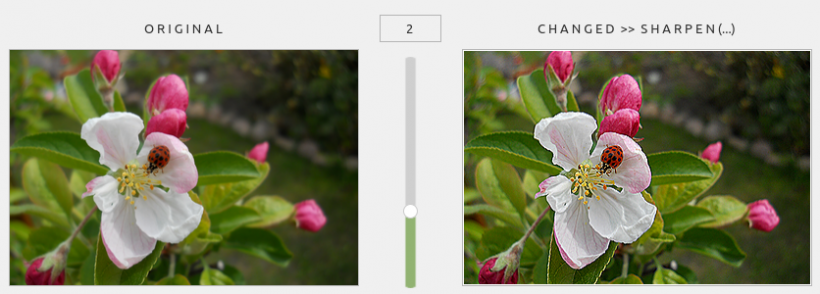
| Sharpen ( [ Radius As Integer ] ) | Image | Creates a sharpened copy of the image and returns it. Radius in the unit pixel is the sharpening radius. It determines how much sharpening should be applied. |
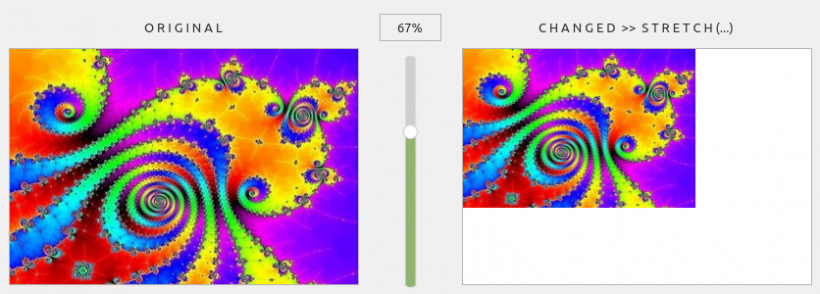
| Stretch ( Width As Integer, Height As Integer ) | Image | Returns a copy of the image with the specified dimensions. Image proportions are not taken into account. |
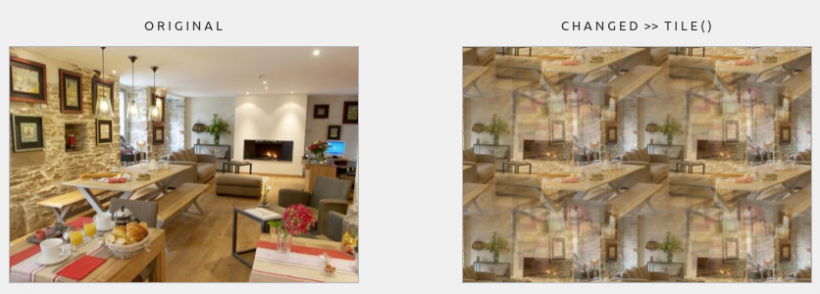
| Tile ( ) | Image | Creates and returns a new version of the image that is seamlessly tiled horizontally and vertically when used as a tile (i.e. drawn multiple times horizontally and vertically). |
Table 23.4.2.9.1 : Methods of the Image class (gb.image.imlib)
Notes
- Blur(…): Note that the Blur() function is used in practice to blur or blur parts of the image - not the entire image.
- PaintImage(…): If Width and Height differ from SrcWidth, SrcHeight, the source image is scaled. SrcX, SrcY, SrcWidth, SrcHeight determine the part of the image to be copied. By default, the entire image is copied. In contrast to DrawImage, the source image is blended with the current image background. Pre-multiplied pixel formats are currently not supported.
- The Tile() method creates an image that is heavily distorted by horizontal and vertical tiling.
23.4.2.9.2 Examples
An example is presented for each method of the Image class (gb.image.imlib). If the methods use parameters, these and the images - the original and the modified one - are displayed. The source code used in each case is also shown in extracts.
Example 1 - Image.Blur(…) method
The method returns a blurred image. A value of 5 is used here as the parameter (blur radius), which can be set using the slider:
Figure 23.4.2.9.1: Blur(5) method Source code snippet
' Gambas class file

Public imgOriginal As Image
Public sImagePath As String

Public Sub Form_Open()

    FMain.Resizable = False

    sImagePath = "images/augentrost_355x242.png"

'-- Display of original and modified image
    imgOriginal = Image.Load(sImagePath)
    pboxOriginal.Picture = imgOriginal.Picture
    pboxChanged.Picture = imgOriginal.Copy().Picture

    pboxOriginal.Stretch = True
    pboxChanged.Stretch = True

'-- Slider configuration
    hSliderV.Visible = True
    hSliderV.MinValue = 0
    hSliderV.MaxValue = 8
    hSliderV.PageStep = 2
    hSliderV.Step = 1
    hSliderV.Mark = False
    hSliderV.Value = 5
    lblValue.Visible = True

End

Public Sub hSliderV_Change()

    lblChanged.Text = "C H A N G E D  —>  " & "B L U R (...)"
    lblValue.Text = hSliderV.Value
    pboxChanged.Picture = imgOriginal.Blur(hSliderV.Value).Picture

End
Example 2 - Image.PaintImage(…) method
You can use this method to insert an image with a specified width and height into the original at a specific position:
Figure 23.4.2.9.2: PaintImage(…) method
Source code snippet
Public Sub btnDoPaintImage_Click()

    lblChanged.Text = "C H A N G E D  >>  " & "P A I N T I M A G E (...)"

    imgExtern = Image.Load("images/augentrost_355x242.png")

    imgOriginal.PaintImage(imgExtern, 200, 150, imgExtern.W / 3, imgExtern.H / 3)

    pboxChanged.Picture = imgOriginal.Picture

End
Example 3 - Image.Rotate(φ) method
The method rotates an image by a certain angle φ. If the value is positive, the image is rotated clockwise - otherwise it is rotated anti-clockwise. Note the resulting (white) border that is automatically added so that the rotated image is always displayed in full. Due to the fixed size of the picturebox for the rotated image, you will only see part of the image in the project!
Figure 23.4.2.9.3: Rotate(arc(63°)) method
Source code snippet
  lblChanged.Text = "C H A N G E D  >>  " & "R O T A T E ( φ )"

  lblValue.Text = hSliderV.Value & "°"
  imgChanged = imgCurrent.Rotate(Rad(hSliderV.Value))
Example 4 - Image.Scroll(…) method
The method moves (!) a defined image section to a specific position in the original if the 4 optional parameters are set:
Figure 23.4.2.9.4: Scroll(…) method
Source code snippet
Public Sub btnDoShift_Click()

  imgOriginal.Scroll(50, 60, 115, 80, 230, 120)
  pboxChanged.Picture = imgOriginal.Picture

End
<code>

By the way: If you do not use the optional parameters and add a slider to the project, you can move the entire image:

<code gambas>
Public Sub btnDoShift_Click()

   imgOriginal.Scroll(160, 130)
   pboxChanged.Picture = imgOriginal.Picture

End
Example 5 - Image.Sharpen(…) method
The method returns a sharper image. A parameter value of 2 appears to produce an optimally sharpened image, as values higher than 2 do not show any significant change:
Figure 23.4.2.9.5: Sharpen(2) method
Source code snippet
  lblChanged.Text = "C H A N G E D  >>  " & "S H A R P E N (...)"
  lblValue.Text = hSliderV.Value
  imgChanged = imgOriginal.Sharpen(hSliderV.Value)
Example 6 - Image.Stretch(…) method
The method creates an image in the project in which the width and height are set proportionally. The image can only be reduced with the set min-max values (0 < p ⇐ 1) for the slider:
Figure 23.4.2.9.6: Stretch(0.67) method
Source code snippet
  Dim W, H As Integer

  lblChanged.Text = "C H A N G E D  >>  " & "S T R E T C H (...)"
  lblValue.Text = hSliderV.Value & "%"

  W = Int(imgOriginal.W * (hSliderV.Value / 100))
  H = Int(imgOriginal.H * (hSliderV.Value / 100))

  pboxChanged.Picture = imgOriginal.Stretch(W, H).Picture
Example 7 - Image.Tile() method
The method creates a new version of the image, which is seamlessly tiled horizontally and vertically and therefore appears very alienated:
Figure 23.4.2.9.7: Tile() method
Source code snippet
  lblChanged.Text = "C H A N G E D  >>  " & "T I L E ( )"
  pboxChanged.Picture = imgOriginal.Tile().Picture

