Sidebar
Table of Contents
23.4.3 Class Picture
This class (gb.qt4) represents a picture. The data of a Picture object (in gb.qt4) is not stored in the address space of the Gambas process, but is located in the address space of the X server. In contrast, an Image object has its content in the address space of the Gambas process. Further information can be found in the QT documentation at:
http://sourceforge.net/p/gambas/code/HEAD/tree/gambas/trunk/comp/src/gb.gui.base/.src/Picture.class.
The Picture class behaves like a (static) array (Picture[]) that can be read and written to.
Dim hPicture As Picture
hPicture = Picture [ Path As String ]
The second instruction returns a Picture object from the internal picture cache. If the picture is not available in the cache, it is automatically loaded from the specified file. If the path begins with “icon: /”, it means that a stock icon is to be loaded. To access these icons, use the Stock class (→ Chapter 20.8). How to insert a picture as an icon in a button. The following image formats are supported: JPEG, PNG, BMP, GIF, SVG, ICO and XPM:
'-- Read
btnClose.Picture = Picture["icon:/16/close"]
With this instruction:
'-- Write
Dim hPicture As Picture
…
Picture[Path As String] = hPicture
you insert a picture into the internal picture cache. The Path parameter is only a key that is used internally for a collection. However, you should note that the key prefix “icon:/” is reserved for Gambas icons.
23.4.3.1 Creating a new picture
Dim hPicture As Picture
hPicture = New Picture ( [ Width As Integer, Height As Integer, Transparent As Boolean ] )
A new picture is created. If the two optional parameters Width and Height are not specified, a new picture exists - but it is empty! You can use the optional parameter Transparent to specify whether the picture has an alpha channel or not. The default value is False.
Properties and methods of the Picture class are presented in the following two sections.
23.4.3.2 Static methods
The Picture class has two static methods: Picture.Load and Picture.Flush.
Static Function Load ( Path As String ) As Picture →Loads a picture from the data carrier.
Static Sub Flush ( ) → Flushes the internal picture cache.
23.4.3.3 Properties
The Picture class has these properties:
| Property | Data type | Description |
|---|---|---|
| Depth | Integer | Returns the colour depth of a picture. The returned value depends on the X11 server. It should be 32 bits. |
| Height | Integer | Returns the height of a picture. |
| Height | Integer | Synonym for Height |
| Width | Integer | Returns the width of a picture. |
| W | Integer | Synonym for Width |
| Image | Image | Converts a Picture into an Image and returns the Image object. |
| Transparent | Boolean | Specifies whether the picture has an alpha channel or not or sets this value. |
Table 23.4.3.3.1 : Properties of the Picture class
23.4.3.4 Methods
The Picture class has the following methods. Note the optional parameters:
| Method | Description |
|---|---|
| Clear ( ) | Clears the picture (H=0 and W=0). |
| Copy ( [ X As Integer, Y As Integer, Width As Integer, Height As Integer ] ) | Returns a 1:1 copy of a picture or the copy of a part of the original picture if the 4 optional parameters are set. |
| Fill ( Color As Integer ) | Fills the picture with the specified colour. |
| Resize ( Width As Integer, Height As Integer ) | Changes the size of a picture. Please note that the picture is not enlarged to scale, but is cut off. |
| Save ( Path As String [ , Quality As Integer ] ) | Saves a picture to a data carrier under the specified (picture) file path. The optional parameter determines the image quality (0..100) of the saved picture. |
Table 23.4.3.4.1 : Methods of the Picture class
23.4.3.5 Project
All properties and methods are used in the project. The relevant source code excerpts are presented for all parts of the programme. The results achieved are displayed.
Create picture
[1] ' Gambas class file
[2]
[3] Public hPicture1 As Picture
[4]
[5] Public Sub Form_Open()
[6]   FMain.Center
[7]   FMain.Resizable = False
[8]   PictureBox1.Stretch = False
[9]   PictureBox1.Picture = Picture["Symbols/intro.jpg"]
[10]   btnClearPic.Picture = Picture["icon:/16/clear"]
[11]   Picture.Flush
[12] End
[13]
[14] Public Sub btnGeneratePic_Click()
[15]   TextArea1.Clear
[16]   hPicture1 = New Picture(PictureBox1.W, PictureBox1.H, True)
[17]   hPicture1.Fill(ColorButton1.Value)
[18]   PictureBox1.Picture = hPicture1
[19]   ShowPropertiesPic(hPicture1)
[20] End
Comment:
- In lines 9 and 10, the images are read from the specified path, saved in the picture cache and displayed on a button and in a PictureBox. The PictureBox used has a fixed width of 360 px and a width of 240 px. The cache is then emptied.
- A new Picture object is created in line 16 with the specified size and transparency property.
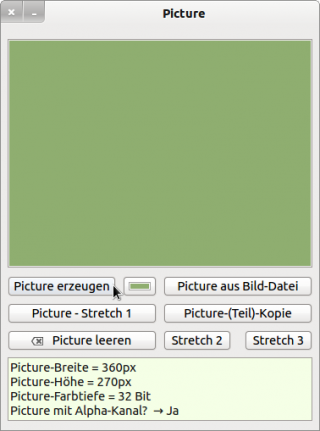
- The picture (line 17) is then coloured in the freely selectable colour and displayed in the PictureBox:
Figure 23.4.3.5.1: A new picture (monochrome) is displayed
Create picture from image file
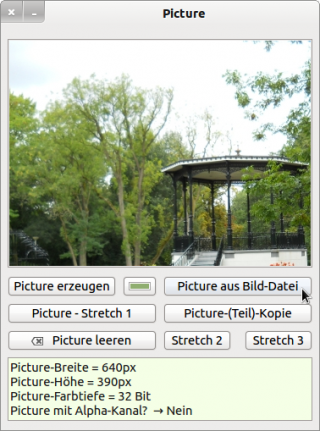
Figure 23.4.3.5.2: Picture display
The picture (width 640 pixels, height 390 pixels) is only displayed incompletely (top left corner) in a PictureBox because this has a fixed size, which is smaller than the picture here.
[1] Public Sub btnPictureFromFile_Click()
[2]   TextArea1.Clear()
[3]   hPicture1 = Picture.Load("Images/b1.png")
[4]   PictureBox1.Picture = hPicture1
[5]   ShowPropertiesPic(hPicture1)
[6] End
Comment:
- In lines 3 and 4, a picture is read from the specified path, saved in the picture cache and assigned to Picture hPicture1.
- The picture (line 17) is then displayed in the PictureBox.
Display the complete picture in the correct aspect ratio in a PictureBox
You can eliminate the disadvantage of displaying the last picture. If the picture is to be enlarged or reduced to scale, you must first convert the picture into an image, then resize it and finally convert the image back into a picture. There is no stretch method for a picture!
[1] Public Sub btnStretch_Click()
[2]   DoStretch("Images/b1.png")
[3] End
[4]
[5] Private Sub DoStretch(sPath As String)
[6]   Dim transImage As Image
[7]   Dim fRatio, fStretch As Float
[8]
[9]   TextArea1.Clear()
[10]   hPicture1 = Picture.Load(sPath)
[11]
[12]   transImage = hPicture1.Image
[13]   If hPicture1.W > hPicture1.H Then
[14]      fRatio = hPicture1.W / hPicture1.H
[15]      PictureBox1.Picture = transImage.Stretch(PictureBox1.W, PictureBox1.W / fRatio).Picture
[16]      fStretch = PictureBox1.W / hPicture1.W
[17]   Else
[18]     fRatio = hPicture1.H / hPicture1.W
[19]     PictureBox1.Picture = transImage.Stretch(PictureBox1.H / fRatio, PictureBox1.H).Picture
[20]     fStretch = PictureBox1.H / hPicture1.H
[21]   Endif
[22]
[23]   TextArea1.Clear
[24]   TextArea1.Insert("Picture-Original-Width = " & hPicture1.W & "px" & gb.NewLine)
[25]   TextArea1.Insert("Picture-Original-Height = " & hPicture1.H & "px" & gb.NewLine)
[26]   TextArea1.Insert("Stretch factor = " & Str(Round(100 * (fStretch), -1)) & " %" & gb.NewLine)
[27]   TextArea1.Insert("Picture with alpha channel? " & " → " & IIf(hPicture1.Transparent, "Yes", "No"))
[28]
[29] End
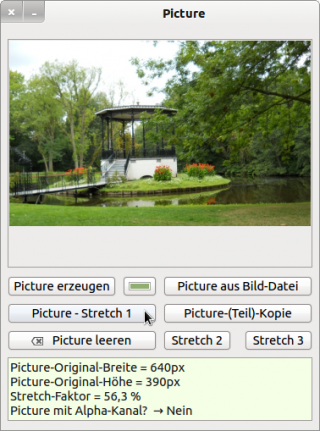
Figure 23.4.3.5.3: True-to-scale display of the picture
Comment:
- In line 10, the content of the file b1.png is assigned to the picture.
- The picture in line 10 is then resized to scale and normalised to the width of the PictureBox, as in the first case (line 13) the width is greater than the height of the picture. On the other hand, the modified image is immediately converted back into a Picture and displayed in the PictureBox.
Create picture copy
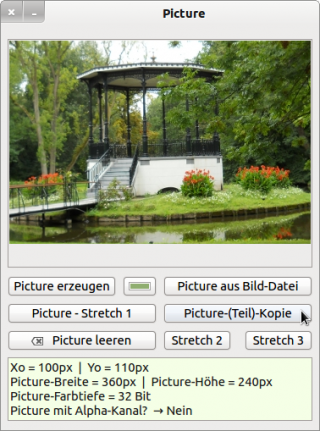
You can create a 1:1 copy of a picture or a copy of a picture section if you set the 4 optional parameters with the correct arguments. In the example, the copy of an image section is created and the width and height are selected so that the copy fits exactly into the PictureBox:
[1] Public Sub btnPartCopyPic_Click()
[2]   CopyPic(100, 110, PictureBox1.Width, PictureBox1.Height)
[3] End
[4]
[5] Private Sub CopyPic(iX0 As Integer, iY0 As Integer, iW As Integer, iH As Integer)
[6]   Dim coPicture As Picture
[7]
[8]   TextArea1.Clear
[9]   hPicture1 = Picture.Load("Images/b1.png")
[10]   coPicture = hPicture1.Copy(iX0, iY0, iW, iH)
[11]   PictureBox1.Picture = coPicture
[12]   If coPicture Then
[13]      TextArea1.Clear
[14]      TextArea1.Insert("Xo = " & iX0 & "px " & " |  Yo = " & iY0 & "px" & gb.NewLine)
[15]      …
[16]   Endif
[17]
[18] End
Figure 23.4.3.5.4: Picture copy as image section
Clear a picture
You can clear a picture using the Clear method.
[1] Private Sub ClearPic(hPic As Picture)
[2]   If hPic Then
[3]      hPic.Clear
[4]      PictureBox1.Picture = hPic
[5]      ShowPropertiesPic(hPic)
[6]   Endif
[7] End
Comment:
- An empty picture still exists as a picture object and has a width of 0 pixels and a height of 0 pixels.
- You cannot save an empty picture in a file.
Saving a picture in a file
In the project, the current picture is always saved in a file in a folder within the project folder at the end of the programme:
[1] Public Sub Form_Close()
[2]  If hPicture1 Then
[3]     If hPicture1.W * hPicture1.H <> 0 Then
[4]        hPicture1.Save("Backup/backup.png", 100)
[5]     Endif
[6]  Endif
[7] End
Comment:
- Line 2 checks whether the picture hPicture1 exists.
- To exclude an empty picture, line 3 checks whether the product of the length and width of the picture is not equal to 0. Zero would result if at least one factor is 0.
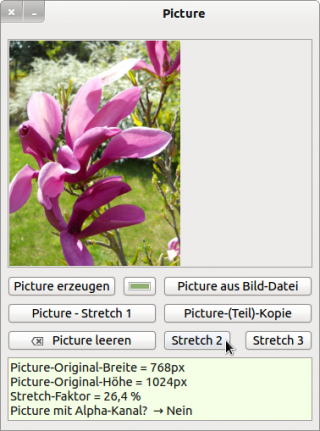
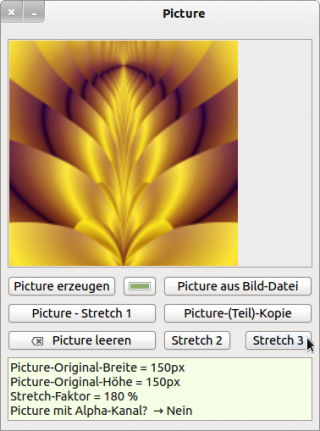
With 'Stretch 2' and 'Stretch 3', pictures are displayed where the height is greater than the width or both values are equal. For the display, the heights are normalised to the height of the PictureBox:
Figure 23.4.3.5.5: Scaled display of pictures
ToolTips with the following content exist for the two buttons 'Stretch 2' and 'Stretch 3':
With 'Stretch 2' a picture is displayed,
where the height is greater than the width.
For the display, the picture height is normalised to
the height of the PictureBox.
With 'Stretch 3' a picture is displayed,
where the height and width are the same.
For the display, the picture height is standardised to
the height of the PictureBox.

