Sidebar
Table of Contents
12.6.1 TabStrip - Projects
In the development of the two projects presented - in which one or more TabStrips (registers) are used - it has proved useful to specify already in the preliminary considerations
- to determine the number of tabs,
- the labels on the tabs, and
- to plan the arrangement of the individual control elements on the individual tabs and their functionality.
In the following paragraphs, the terms TabStrip and tab are used synonymously. If you are working with a tab strip for the first time, you need to know that some properties in the Properties window apply globally to the selected tab as a container component and others only to the selected tab card. When you drag a tab strip control in the IDE from the component tab in the 'Container' tab onto the form, you will initially only see one tab card with the label 'Tab0' for the tab tab. After you have set the required number of tabs in the properties window, the number of visible tabs also increases - whereby the additional tabs have no labels. At this point at the latest, you should save the project! If you now click on the first tab, the label 'Tab0' for the first tab disappears. Since the first tab is marked (→ marker at the top of the tab), you can now set its essential properties in the properties window:
- Text → Text on Tab Tab,
- Enabled → Indicates with the value 'True' whether the tab is active,
- Visible → Signals the visibility of a tab with the value 'True',
- Picture → Inserts an icon on the tab before the text,
- Closable → For the value 'True' all tabs get a close button.
After selecting more tabs, you can also change their properties, with the 'Form' toolbar changing in the following way when a tab is selected:

Figure 12.6.1.1: Toolbar 'Form' - Original

Figure 12.6.1.2: Modification of the toolbar 'Form' - navigation and button
If you then click on the button marked in red in → Figure 12.6.1.2, you can on the one hand see all the labels of the tabs and select the tab to be edited, which can otherwise also be done by clicking on a tab in the tab:

Figure 12.6.1.3: Tab tab caption menu
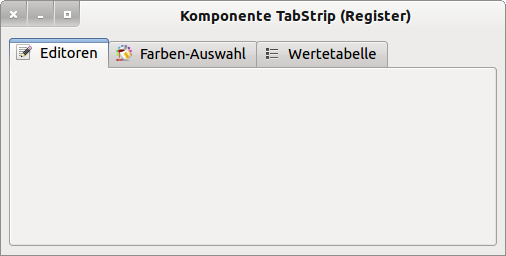
Alternatively, use the offered navigation through the tabs with the 4 new buttons → Figure 12.6.1.2. Start the programme and you will see a functional tab:
The next step is to implement the planned functionality by designing the individual register cards.
12.6.1.1 Project 1
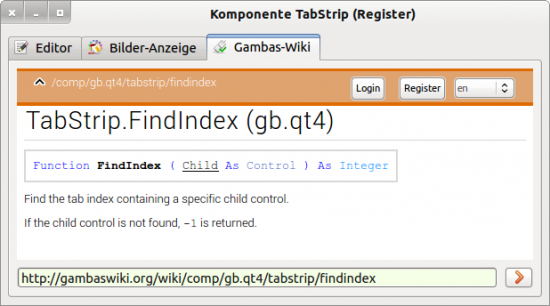
The special feature of the first project is that a register with two register cards is created at development time, and the properties of the register and register cards have been set in the properties window and in the source code. At runtime, another register card can be inserted into the register (source code 1). This 3rd register card can then be shown and hidden and the properties of all three register cards can be read out.
Source text 1:
Public Sub btnCreateNewTab_Click()
 If TabStrip1.Count = 2 Then
  ' Insert another tab card
    Inc TabStrip1.Count
  ' Set essential properties of the tab card
    TabStrip1[2].Caption = "Gambas-Wiki"
    TabStrip1[2].Picture = Picture["icon:/16/connect"]
    TabStrip1[2].Enabled = True
    TabStrip1[2].Visible = True
  ' Insert 2 control elements into the tab card (container)
  ' 1st control element: WebView
    hWebView = New WebView(TabStrip1) As "hWebView
  ' WebView properties
    hWebView.Expand = True
  ' 2nd control element: HBox
    hhboxNavigation = New HBox(TabStrip1) As "hhboxNavigation
  Properties HBox
    hhboxNavigation.Height = 24
    hhboxNavigation.Spacing = True
  ' Insert 2 control elements into the HBox (container)
  ' 1st control element: TextBox
    htxtURL = New TextBox(hhboxNavigation) As "htxtURL" ' Properties TextBox(hhboxNavigation)
  ' Properties TextBox
    htxtURL.Height = 24
    htxtURL.Background = &HF5FFE6
    htxtURL.Expand = True
    htxtURL.Text = "http://gambaswiki.org/wiki/comp/gb.qt4/tabstrip/findindex" ' 2nd control element: button
  ' 2. Control element: Button
    hbtnOpen = New Button(hhboxNavigation) As "hbtnOpen"
  ' Properties Button
    hbtnOpen.Height = 24
    hbtnOpen.Width = 32
    hbtnOpen.Picture = Picture["icon:/16/right"]

  ' Tab map 'Gambas-Wiki' declared as current tab map
    TabStrip1.Index = TabStrip1.Count - 1
    htxtURL_Activate() ' Display specified web page → htxtURL.Text
 Endif
End ' btnCreateNewTab_Click()

Public Sub btnChangeVisibility_Click()
  If TabStrip1.Count > 2 Then TabStrip1[2].Visible = Not TabStrip1[2].Visible
End ' btnChangeVisibility_Click()

Public Sub btnGetInformations_Click()
  Dim i, k As Integer
  Dim hControl As Control
  Dim sMessage As String

  sMessage = "<hr><b><font color='Red'>Tab properties</font></b><hr>"
  For i = 0 To TabStrip1.Count - 1
    sMessage &= "<font color='Blue'>Index = " & CStr(i) & "</font>"
    sMessage &= " <br>Tab-Map-" & CStr(i + 1) & "-Label = '"
    sMessage &= TabStrip1[i].Caption & "'"
    sMessage &= " <br>Tab Map-" & CStr(i + 1) & " activated? " & String.Chr(10230)
    sMessage &= IIf(TabStrip1[i].Enabled = "T", " Yes", " No")
    sMessage &= " <br>Tab Map-" & CStr(i + 1) & " visible? " & String.Chr(10230)
    sMessage &= IIf(TabStrip1[i].Visible = "T", " Yes", " No")
    sMessage &= " <br>Number of control elements on the " & CStr(i + 1)
    sMessage &= ". Tab-Map= " & CStr(TabStrip1[i].Children.Count)
    k = 1
    For Each hControl In TabStrip1[i].Children
      sMessage &= "<br>" & CStr(k) & ". Control items-Name = '" & hControl.Name & "' "
      Inc k
    Next
    sMessage &= "<br><hr>"
  Next
  Message.Info(sMessage)

End ' btnGetInformations_Click()
The following figure shows the generated 3rd tab map with an excerpt from the Gambas documentation on the TabStrip class (gb.qt4) in a WebView:
12.6.1.2 Project 2
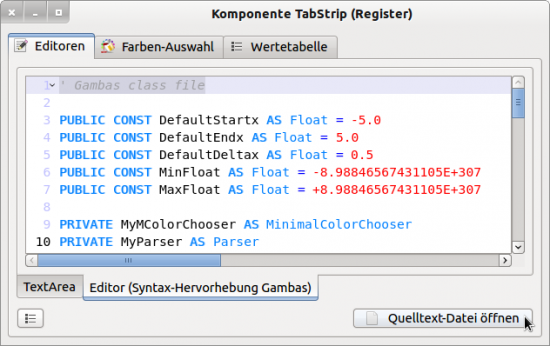
The second project has another register with two register cards as a special feature on the first register card:

Figure 12.6.1.2.1: Use of two registers
The next source code snippet from the Form_Open() procedure refers to register 1 and the setting of the properties of register card 2 and the components placed on it:
' Tab 1 Map 1 - Editors ------------------------------
' Tab 2 in Tab1 Map 1 ---------------------------
  TabStripEditors.Count = 2
' Both editors completely fill tabs 2.1 and 2.2 respectively.
  TabStripEditors.Arrangement = Arrange.Fill
  TabStripEditors.Expand = True ' Can be omitted because of Arrange.Fill
  TabStripEditors.Margin = True
  TabStripEditors.Orientation = Align.Bottom
  TabStripEditors[0].Text = "TextArea"
  TabStripEditors[1].Text = "Editor (Syntax highlighting Gambas)"

  hboxFileOpen.Spacing = True
  panSpace1.Expand = True

' Tab-Map 2.1 - TextArea
  TextArea1.Background = &HF5FFE6

' Tab-Map 2.2 - Editor (gb.qt4.ext)
  Editor1.Highlight = Highlight.Gambas ' Syntax highlighting for the Gambas language.
  Editor1.KeywordsUseUpperCase = True ' Capitalisation of all (Gambas) key words
  Editor1.Flags[Editor1.ShowLineNumbers] = True ' Display of line numbers
  Editor1.Flags[Editor1.ShowCurrentLine] = True ' Highlight the current line
  Editor1.Flags[Editor1.BlendedLimits] = True ' Separation line between the individual procedures
' Display of tab 2.2 (Editor)
  TabStripEditors.Index = 1
As of Gambas 3.8.0, you should replace the editor with the TextEditor (gb.form.editor).


