Sidebar
Table of Contents
12.8.1 Wizard - Projects
The Wizard class is mainly used to realise a dialogue that consists of several steps, which can be cancelled if necessary, and which triggers a certain action in the final step with the OK button, which provides dialogue data. On the other hand, the Wizard component can also be used to navigate through a sequence of steps - without returning a result, as would be the case with a help wizard, for example.
In the development of the projects presented - in which the two use cases mentioned above are realised - the preliminary considerations referred to in the first part of chapter → 12.6.1 'TabStrip - Projects' have proven to be adequate.
12.8.1.1 Project 1
The first project is characterised by using a wizard for a dialogue. The dialogue is called by a database programme and provides it with an active DB connection as a result of a successful dialogue, or no DB connection if the dialogue was aborted or faulty.
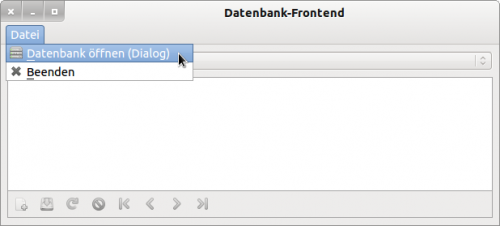
Figure 12.8.1.1: Calling a dialogue (wizard) in the database programme
Source code extract from the database programme:
Private $hConnection As Connection

Public Sub Form_Open()
  FMain.Center
End ' Form_Open()

Public Sub mnuOpen_Click()
  Dim hNewConnection As Connection

  Try $hConnection.Close()
  hNewConnection = FMakeConnection.RunDialog()
  If Not hNewConnection Then Return
  $hConnection = hNewConnection
  Refresh()
End ' mnuOpen_Click()
In the class FMakeConnection.class, the RunDialog() function contains the complete dialogue.
Source text dialogue:
[1] ' Gambas class file
[2]
[3] Private $hDBConnection As New Connection
[4] Private Const ACTIONTEXT As String = "Open database"
[5]
[6] Public Function RunDialog() As Connection
[7]   Me.ShowModal()
[8]   Return $hDBConnection
[9] End ' Run() As Connection
[10]
[11] Public Sub Form_Open()
[12]
[13]   FMakeConnection.Text = "Dialog - Database connection"
[14]
[15]   wizConnect.Count = 3
[16]   wizConnect.Animated = True
[17]   wizConnect.Margin = True
[18]   wizConnect.ShowTitle = True
[19]   wizConnect.ShowButton = True
[20]
[21]   wizConnect.ActionPicture = Picture["icon:/16/view-detail"]
[22]   wizConnect.ActionText = ACTIONTEXT
[23]
[24]   wizConnect.ShowIndex = True
[25]   wizConnect[0].Text = "Select the database type!" ' #1
[26]   wizConnect[1].Text = "Select a SQLite3 database!" ' #2
[27]   wizConnect[2].Text = "Enter credentials and connect to the server with '" & ACTIONTEXT & "'.!"
[28] ' Start-Verzeichnis im FileChooser (Step #2 - SQLite3)
[29]   fchSqlite.Root = Application.Path &/ "DBSQLite3"
[30]
[31] End ' Form_Open()
[32]
[33] Public Sub wizConnect_BeforeChange()
[34] ' If SQLite3 is selected as the DBMS, then show step #2.
[35] ' and hide step #3. Opposite for MySQL and PostgreSQL.
[36]
[37]   If Not wizConnect[wizConnect.Index].Enabled Then Return
[38]   If radSqlite3.Value = True Then
[39]      wizConnect[1].Enabled = True  ' Step #2 display
[40]      wizConnect[2].Enabled = False ' Step #3 hide
[41]      wizConnect.ActionText = "Open SQLite3-database"
[42]   Else
[43]      wizConnect[2].Enabled = True  ' Step #3 display - logically this is step 2
[44]      wizConnect[1].Enabled = False ' Step #2 hide
[45]    ' Set port for PostgreSQL (5432) or MySQL (3306) in step #3
[46]      spbPort.Value = IIf(radPostgreSql.Value, 5432, 3306)
[47]      wizConnect.ActionText = ACTIONTEXT
[48]   Endif
[49] End ' wizConnect_BeforeChange()
[50]
[51] Public Sub wizConnect_Close()
[52]
[53]   If radSqlite3.Value Then
[54]      If Not fchSqlite.SelectedPath Then
[55]         Message.Error("No database file was selected.")
[56]         Return
[57]      Endif
[58]      $hDBConnection.Type = "sqlite3"
[59]      $hDBConnection.Name = fchSqlite.SelectedPath
[60]   Else
[61]      $hDBConnection.Type = IIf(radPostgreSql.Value, "postgresql", "mysql")
[62]      $hDBConnection.Host = txtHost.Text
[63]      $hDBConnection.Port = spbPort.Value
[64]      $hDBConnection.Login = txtUser.Text
[65]      $hDBConnection.Password = txtPassword.Text
[66]      $hDBConnection.Name = txtDatabase.Text
[67]   Endif
[68]   $hDBConnection.Open()
[69]   Me.Close()
[70]   Catch
[71]     Message.Error(Error.Text)
[72] End ' wizConnect_Close()
[73]
[74] Public Sub wizConnect_Cancel()
[75]   Me.Close()
[76] End ' wizConnect_Cancel()
[77]
[78] Public Sub wizConnect_Change()
[79] ' Print "CURRENT INDEX = "; wizConnect.Index
[80] End ' wizConnect_Change()
[81]
[82] Public Sub Form_Close()
[83]   If Not $hDBConnection Or If Not $hDBConnection.Opened Then $hDBConnection = Zero
[84] End ' Form_Close()
Comment:
- Depending on the selected DBMS, the event wizConnect_BeforeChange() in lines 33 to 49 carries the main load of the dialogue.
- If the dialogue is closed, then the necessary parameters for opening a DB connection are determined in lines 53 to 67 and then a DB connection to the selected database is established (→ lines 68 and 69).
- Subsequently, the database data of the selected DB table are displayed in a database browser in the DB programme.
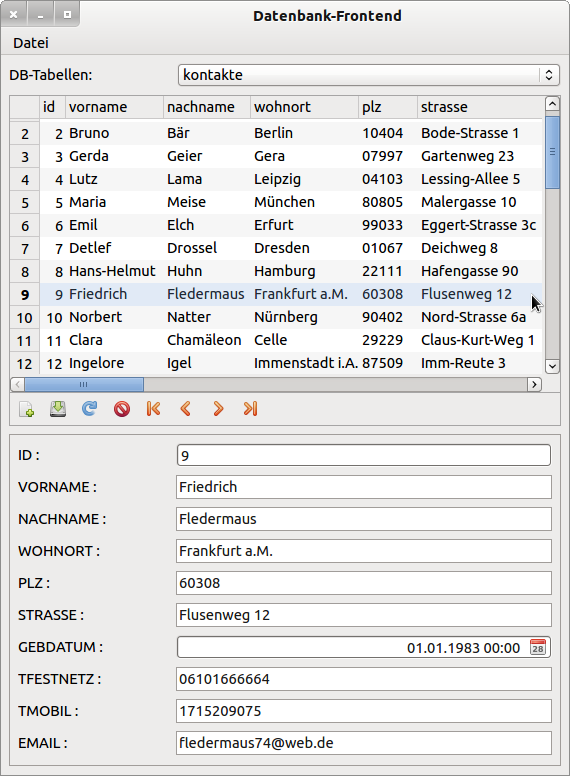
Figure 12.8.1.1.2: Display of the DB data for the table 'contacts' in the selected database.
Conversion:
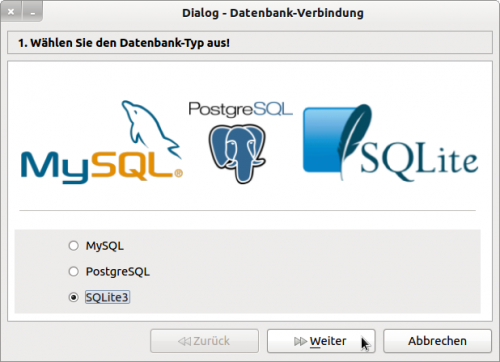
Figure 12.8.1.1.3: Step 1 - DBMS selection
In the first step of the wizard, a database management system (DBMS) can be selected.
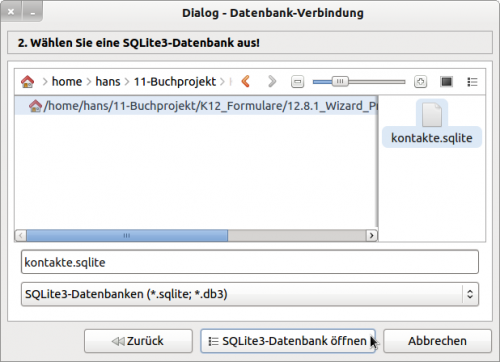
Figure 12.8.1.1.4: Step 2 - Selection SQLite3 database
In the 2nd step, for example, an SQLite3 database is selected.
Notice: In project 1, an SQLite3 database is provided in the project folder for you to try out yourself. You can restart the dialogue at any time via the DB programme menu.
12.8.1.2 Project 2
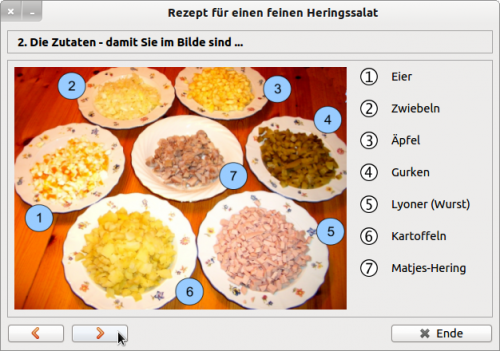
The second project uses a wizard to navigate through several related steps. The display of a recipe in 4 steps serves as an example. Since no action needs to be triggered in the last step and the display can be cancelled at any time by the end of the programme, the buttons are not displayed in the lower panel of the wizard. Therefore, set the property Wizard.ShowButton to False already in the IDE.
However, you now have to take care of the navigation between the individual steps yourself. This can be done without problems by using the two methods Wizard.MoveNext and Wizard.MovePrevious:
Public Sub btnNext_Click()
  If wizRezept.Index < wizRezept.Count Then
     wizRezept.MoveNext
     btnPrevious.Enabled = True
  Endif
  If wizRezept.Index = wizRezept.Count - 1 Then btnNext.Enabled = False
End ' btnNext_Click()
Public Sub btnPrevious_Click()
  If wizRezept.Index < wizRezept.Count Then
     wizRezept.MovePrevious
     btnNext.Enabled = True
  Endif
  If wizRezept.Index = 0 Then btnPrevious.Enabled = False
End ' btnPrevious_Click()
In the following figure you can see the content of the 2nd step and the two buttons for navigation as well as the end button:
12.8.1.3 Project 3
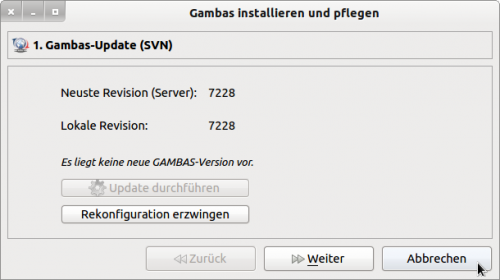
For project 3 - which is similar in layout to the first project - only the project archive is made available to you for testing. The project implements the installation of Gambas in the current version via SVN. The wizard has only 2 steps:
- step Copy the SVN repository (1K) (default path or self-selected path) or Update the SVN repository (1U).
- Step Installation of Gambas.
First check whether the Subversion programme is installed on the system. If it is not, the programme will exit with an error message.Otherwise, the very first time you start the programme, the first step 1K will be displayed and you can specify the installation path or choose the default path.At each subsequent start of the programme, step 1U will be displayed and an update will be offered if the version on the server is higher than the version of the local copy of the SVN repository. The directory for the local SVN repository is saved at the end of the programme and read in at the start of the programme (Settings class).
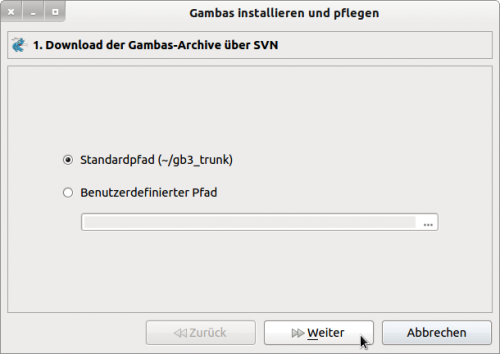
Figure 12.8.1.3.1: Display step 1K
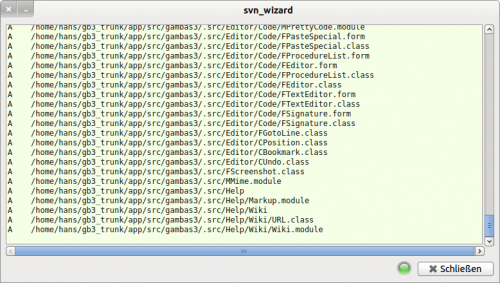
Figure 12.8.1.3.2: Local copy of the SVN repository.
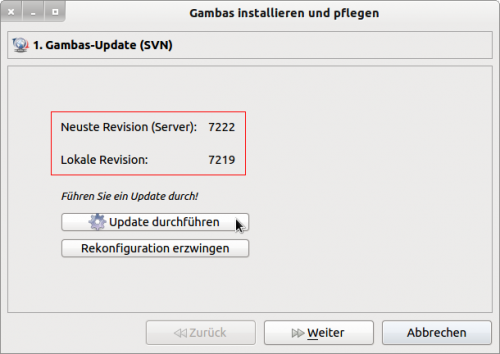
Figure 12.8.1.3.3: Display step 1U
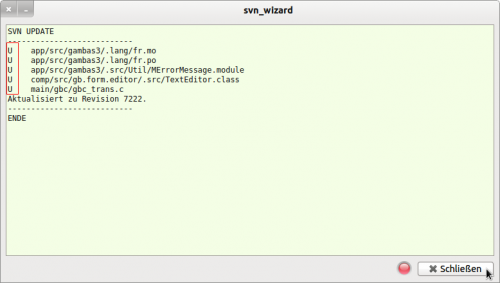
Figure 12.8.1.3.4: Update of the local SVN repository
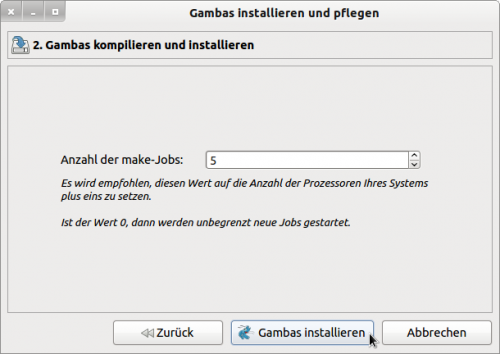
Figure 12.8.1.3.5: Step 2 - Installing Gambas
In step 2 of the wizard you can still specify the number of jobs and then start the installation of Gambas.
If this interface is displayed when starting the programme, you can either force a reconfiguration of the sources or cancel the programme or install the displayed local version of Gambas after 'Next' - if this has not already been done:

