Sidebar
Table of Contents
20.8 Class Stock
The Stock class allows you to access icons from the Gambas inventory in predefined image sizes in units of pixels. The square icon sizes are 16 (small), 22 (medium), 32 (large), 48 (huge), 64, 96 and 128. You can assign an icon - as small images with an icon - to the following components:
Button, ButtonBox, CheckBox, ColorButton, ColorChooser, ColumnView, ComboBox, Container, Control,
DateBox, DateChooser, Dial, DirChooser, DirView, DrawingArea, Editor, Embedder, Expander, FileChooser,
FileView, FontChooser, Form, Frame, GridView, HBox, HPanel, HSplit, IconPanel, IconView, LCDNumber,
Label, ListBox, ListContainer, ListView, MaskBox, MenuButton, MovieBox, Panel, PictureBox, ProgressBar,
RadioButton, ScrollArea, ScrollBar, ScrollView, Separator, SidePanel, Slider, SpinBox, TabPanel,
TabStrip, TableView, TextArea, TextBox, TextEdit, TextLabel, ToggleButton, ToolButton, ToolPanel,
TrayIcon, TreeView, UserContainer, UserControl, VBox, VPanel, VSplit, ValueBox, Window, Wizard,
_IconPanelContainer, _TabPanelContainer, _WizardContainer
The assignment is done either at development time in the IDE in the properties window or at runtime of the programme. Then you have to code the corresponding instructions.
20.8.1 Assigning an icon for a component in the IDE
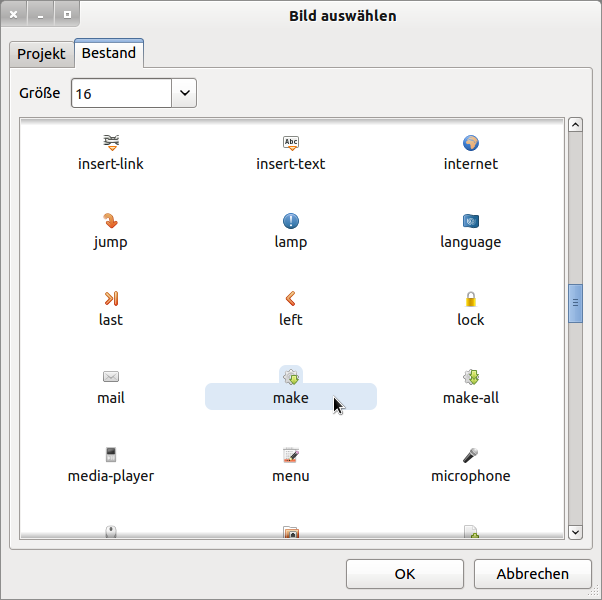
After you have placed a component on the form, you can assign an icon to that component. If a component is selected, then you will see essential properties of the component in the Properties window. Look for the property Picture and not - as you would assume - for Icon. First click in the empty input box and then on the small three dots that appear. A picture selection dialogue opens. First select the stock tab, then the appropriate size for the icon and finally the icon. Close the dialogue with 'OK'.
Figure 20.8.1.1: Icon Selection Dialogue
In the properties window you will see the following entry:
Figure 20.8.1.2: Icon selection dialogue box
20.8.2 Determining icon names from the Gambas inventory
If you want to code the instructions to assign an icon to a component, then you need the name of the small image with an icon. You determine these names of the individual icons from the inventory of Gambas in a small project - including the display of the icons - with a few lines of code after you have positioned the IconView component on the form:
' Gambas class file

Public Sub Form_Open()
  FMain.Height = 272
  FMain.Width = 664
  FMain.Center()
  FMain.Resizable = True
  FMain.Arrangement = Arrange.Fill
  DisplayIcons()
End

Private Sub DisplayIcons()
  Dim sIconKey, sIconName As String

  IconView.Clear()
  For Each sIconKey In Stock.Icons '-- Up to version GB 3.2 for the property Stock.Icons → Set Stock.List
      sIconName = "icon:/32/" & sIconKey
      IconView.Add(sIconKey, sIconKey, Picture[sIconName])
  Next

End
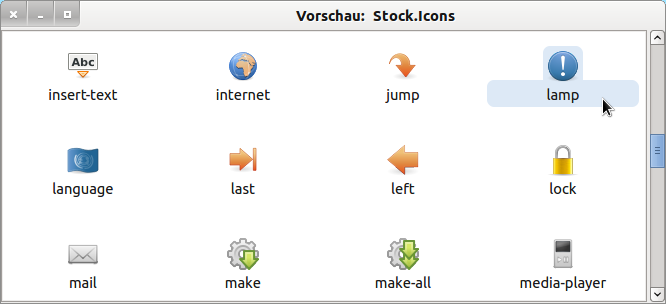
After starting the programme, you will see the icons and find out the corresponding name, which is not always obvious from the icon, as the picture with the exclamation mark shows:
Figure 20.8.2.1: IconView with icon from the Gambas inventory
Note: Under Ubuntu, the display of icons in components is switched off (default) on the grounds that they would only disturb the user. To see the icons, you have to execute the following command in a terminal, then the colourful world of icons - not only in menus - is back in order:
ALT+F2 —> terminal window:
gconftool --type=bool --set /desktop/gnome/interface/menus_have_icons 1
gconftool --type=bool --set /desktop/gnome/interface/buttons_have_icons 1
20.8.3 Assigning an icon for a component - project
After you know the names of the icons, you can also code the assignment of the small pictures with an icon in the source code of a project. This becomes necessary if, for example, you want to change the icons depending on certain programme states. You should have a look at the two examples in the help of Gambas at http://gambasdoc.org/help/comp/gb.form/stock?v3 under this aspect!
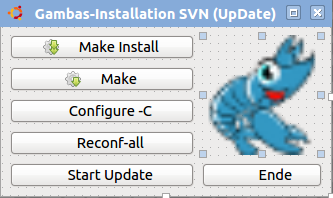
In the presented project SVN many pictures are used. On the one hand there are icons from the inventory of Gambas and on the other hand there is a larger image that was saved in a special project folder. Two components are already assigned icons at development time - here they are buttons. A description of this can be found in chapter 20.8.2. The assignments of the other images are coded. If a component has been deactivated, you will only see the icon in the unit colour grey. The icons all have the same size 16px. However, you can also use the constant small in the source code instead of the numerical value 16. The unit px is not used.
Figure 20.8.3.1: Form at development time
In the following excerpt, only the source code of the event-handling routine Form_Open() is shown because it contains all the relevant instructions - highlighted in yellow:
Public Sub Form_Open()

  FMain.Center
  FMain.Resizable = False
  PictureBox1.Picture = Picture["IconLast/new-logo.png"] ' Logo GB2

  btnUpdateStart.Picture = Picture["icon:/16/play"]
  btnReconfUpdate.Picture = Picture["icon:/16/revert"]
  btnConfigureUpdate.Picture = Picture["icon:/16/tools"]

  btnClose.Picture = Picture["icon:/small/quit"] ' small = 16px

  SVNSettings = New Settings
  iSVNLastRevision = SVNSettings["Revision/LastRevision", 0]
  InstallSubversion()

  sSVNPfad = User.Home &/ "gb3_trunk"
  If Not Exist(sSVNPfad) Then
    Try Mkdir sSVNPfad
    If Error = True Then
      Message.Error("Fehler beim Anlegen des Ordners" & sSVNPfad)
      Return
    Endif
  Endif

  btnReconfUpdate.Enabled = False
  btnConfigureUpdate.Enabled = False
  btnMakeUpdate.Enabled = False
  btnMakeInstallUpdate.Enabled = False

End
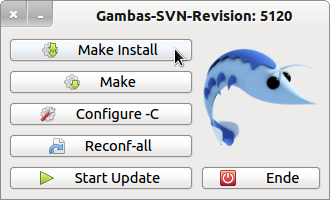
After installing the latest revision of Gambas, all buttons have been activated and all icons show their coloured side:
Figure 20.8.3.2: Form at runtime
If you do not find any icons with suitable symbols in the Gambas inventory, then you can
- insert a suitable icon, for example, in the project folder Symbols
- the small image with the desired icon after a right-click on Data in the project create new. A menu list opens in the context menu with New> Picture, which you activate. In the dialogue under 'New', enter a picture name and set the picture size to a suitable 16×16 in the options. Leave the image type unchanged (→ Image extension .png). If, on the other hand, you select 'Existing', you can search for a suitable image with a symbol and integrate it as a new icon in your project.


