Sidebar
Table of Contents
18.4 ToolPanel (gb.form)
The ToolPanel control implements a toolbox with multiple vertically scrollable toolbar bars. The class can be created. To create a new ToolPanel:
Dim hToolPanel As ToolPanel
hToolPanel = New ToolPanel ( Parent As Container ) [ As "EventName" ]
The class behaves like a read-only array and returns an object representing one of the toolboxes.
Dim hToolPanel As ToolPanel
Dim hToolPanelContainer As _ToolPanelContainer
hToolPanelContainer = hToolPanel [ Index As Integer ]
18.4.1 Properties
The ToolPanel class has these properties, among others:
| Property | Data type | Description |
|---|---|---|
| Animated | Boolean | Determines whether the toolbars are animated. |
| Border | Boolean | Determines or sets whether the ToolPanel has a border. |
| Count | Integer | Returns or sets the number of toolbars. |
| Font | Font | Returns or sets the font used to draw text in the control. |
| Index | Integer | Returns or sets the current toolbar. |
| Picture | Picture | Returns or sets the symbol (data type: Picture) displayed in the button of the current toolbar. |
| Text | String | Returns or sets the caption of the current toolbar. |
Table 18.4.1.1 : Properties of the class ToolPanel
18.4.2 Events
The ToolPanel class has only two relevant events:
| Event | Description |
|---|---|
| DblClick ( ) | This event is triggered when the user quickly clicks twice on the control. |
| Click ( ) | This event is triggered when the user selects a toolbar in the ToolPanel. |
Table 18.4.2.1 : Events of the ToolPanel class
18.4.3 Project
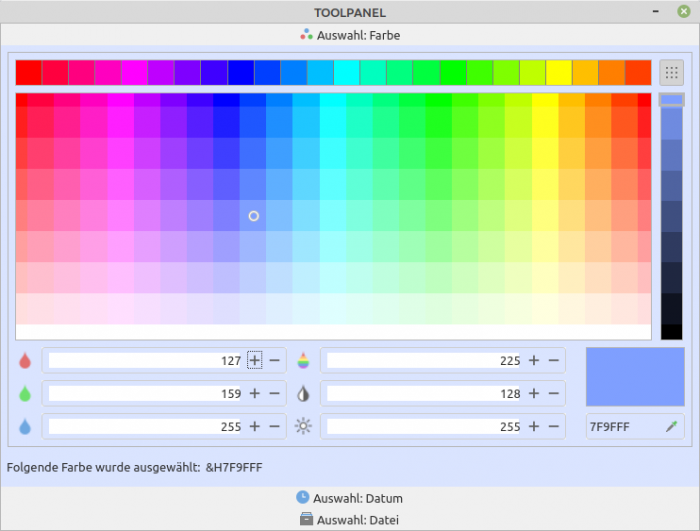
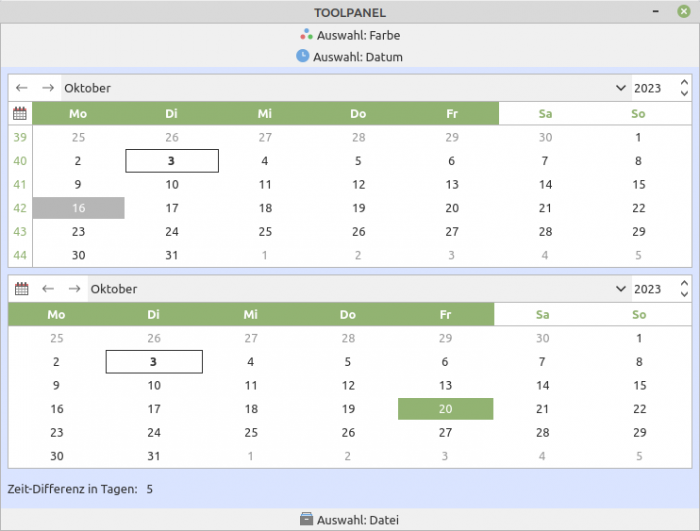
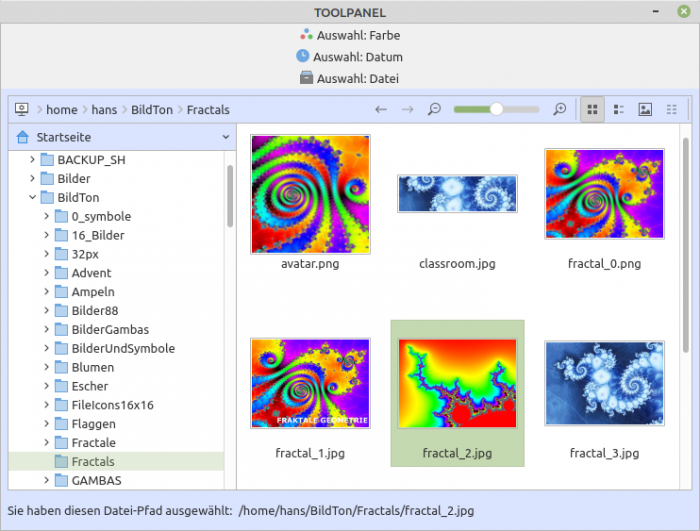
Presented is a small project where you can select one of three toolbars in a ToolPanel that provide different functionalities:
Figure 18.4.3.1: Selection: Colour
Figure 18.4.3.2: Selection: Date
Figure 18.4.3.3: Selection: File
For the ToolPanel, on the one hand you can define its basic properties in the IDE and on the other hand, after defining how many toolbars the ToolPanel should hold, you can also define the essential properties of the individual ToolBars.
The source code looks very clear because only the essential functionality of the individual toolbars needs to be specified (selection of colour, selection of date1 and date2 and selection of file):
' Gambas class file

Public Sub Form_Open()

    FMain.Resizable = False
    ColorChooser1.Value = &HCF3FFF

    FileChooser1.Root = User.Home
    FileChooser1.Multi = False
    FileChooser1.Filter = ["*.png;*.jp*;*.gif", "Picture files", "*.txt;*.xml;*.conf", "Text files"]
    FileChooser1.FilterIndex = 0        '-- Display images with the extensions png, jp* and gif first
'-- FileChooser1.FilterIndex = -1       '-- Display all files
'-- FileChooser1.ShowFile = True        '-- Default-Value is 'True'
'-- FileChooser1.ShowDirectory = False  '-- Default-Value is 'False'
'-- FileChooser1.ShowButton = False     '-- Default-Value is 'False'
    FileChooser1.ShowPreview = True     '-- Default-Value is 'False'
End

Public Sub DateChooser1_Change()

  lblDifferenceInDays.Text = RunDateDiff(DateChooser1.Value, DateChooser2.Value)

End

Public Sub DateChooser2_Change()

  lblDifferenceInDays.Text = RunDateDiff(DateChooser1.Value, DateChooser2.Value)

End

Private Sub RunDateDiff(hDate1 As Date, hDate2 As Date) As Integer

  Return Abs(DateDiff(hDate1, hDate2, gb.Day)) + 1

End

Public Sub ColorChooser1_Change()

  lblColor.Text = "&H" & Hex(ColorChooser1.Value)

End

Public Sub FileChooser1_Change()

    lblFilename.Text = ""
    If FileChooser1.SelectedPath Then lblFilename.Text = FileChooser1.SelectedPath

End

Public Sub FileChooser1_Activate()

    If FileChooser1.Multi = False Then
       lblFilename.Text = FileChooser1.SelectedPath
   '-- Message.Info("Selected file:<hr>" & FileChooser1.SelectedPath)
   '-- Desktop.Open(FileChooser1.DirView.Current &/ FileChooser1.FileView.Selection[0])
       Desktop.Open(FileChooser1.SelectedPath)
    Endif

End
A special feature when selecting a file is that after double-clicking on a file, the selected file is opened with the (standard) editor and its contents are displayed.
The complete source code is made available to you in a project archive in the download area.


