Sidebar
Table of Contents
11.10.1 Create installation package
Check again which files you want to share with your program and if these files are in the correct folders.
- Finally check whether all translations from English into German have been completed.
- Make sure that you have thoroughly tested the program to be exported and that the project has been cleaned up, which includes creating an executable file.
The wizard for creating an installation package (Packer Wizard) in 10 steps can be found under Project> Create>Install package or you can call it directly in the IDE with CTRL+ALT+I. Fill in all required information carefully and thoroughly!
11.10.1.1 Step 1 - Package information
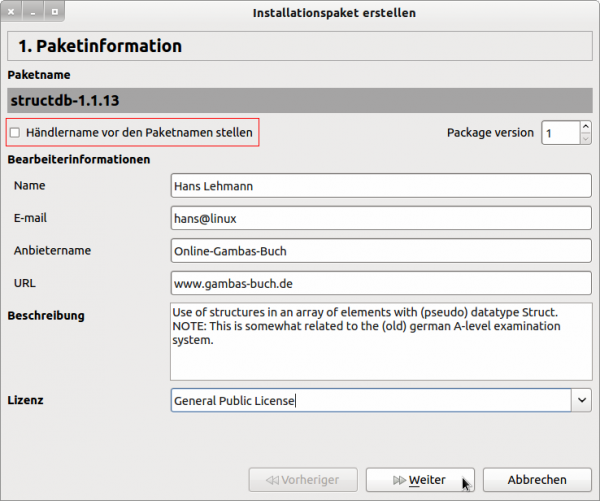
Figure 11.10.1.1.1.1: Step 1 - Packet information
You can change or supplement the settings in the menu item' Tools' in the Gambas IDE here. The description' dealer name' and' provider name' are used synonymously here.
If you do not enter a provider name, a standard text will be inserted automatically. Use the character string “- - - -” instead. By default, however, the retailer name is not placed before the package name.
11.10.1.2 Step 2 - Change protocol
Figure 11.10.1.2.1: Step 2 - Change log
In this step, you should document the project progress and changes to older versions for the program user.
Make sure to make these entries for the StructDB project in English and German, as these entries are not available for translation in the Translation Wizard!
11.10.1.3 Step 3 - Destination distribution
Select the target distributions you need to share on the target machine:
Figure 11.10.1.3.1: Step 3 - Selecting the destination distribution Mint
11.10.1.4 Step 4 - Package Group
Here the selection' database' from the given list fits well for the database project.
11.10.1.5 Step 5 - Menu item
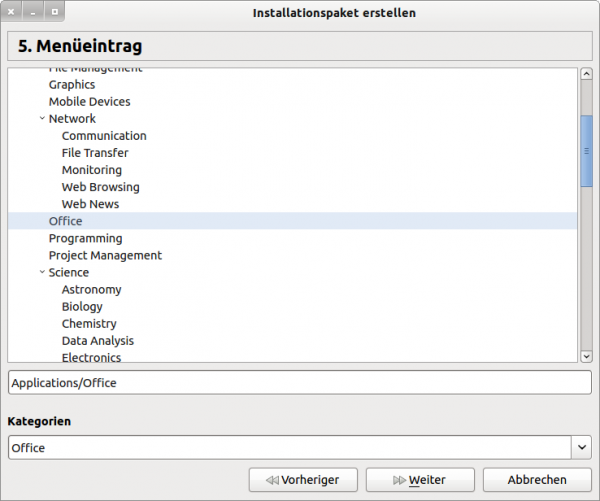
In this step, you will also be offered a list from which you can choose immediately in the upper part. The entries from the combo box are available for specifying the category:
Figure 11.10.1.5.1: Step 5 - Menu entry
Obviously, menu entries on a target computer with MINT 17.1 are ignored that are not main entries in the MINT menu. The StructDB program then appears in the MINT menu under the menu item 'Other'. When selecting 'Applications/Office' you will find the program in the correct menu entry under 'Office'.
11.10.1.6 Step 6 - Desktop configuration file
1st variation
The program StructDB has a memory management function with which you can save the database structure (data type Struct → chapter 7.2 Structures - Struct) serialized in a file and read it out again. This is how you determine the MIME type of a file under Ubuntu - where the term content type would be more suitable:
hans@linux:~/11-Buchprojekt/$ xdg-mime query filetype ~/StructDB/example.sdb
application/octet-stream
The content type for these *.sdb files is therefore application/octet-stream and is independent of the self-assigned file extension.sdb for the database files! Specifying the appropriate mime type application/octet-stream for the database file in the Packer Wizard automatically creates the entry in the system-wide file /usr/share/applications/mimeinfo.cache of the target computer when the installation package is installed on the target computer:
application/octet-stream=StructDB.desktop
This saves (internally via the Args component) that after double-clicking on a *.sdb file the database program StructDB opens, the records from the selected *.sdb file are read and displayed. As long as there is only one single mime entry for application/octet-stream, the database program StructDB is the default program; otherwise you must right-click to open the database program. Under the link: http://wiki.ubuntuusers.de/MIME-Typ you will find a good description of the MIME type.
Since the MIME type application/octet-stream for a database file of the program StructDB is application/octet-stream, this type is entered here:
Figure 11.10.1.6.1: Step 6 - Defining the MIME Type - Variant 1
2nd variation
In this variant, a new MIME type is created and registered on the target computer using entries in both step 6 and step 8:
Figure 11.10.1.6.6.2: Step 6 - Defining the MIME Type - Variant 2
The .desktop files associate certain file content types (MIME types) with programs and thus determine which programs are used to process files of a certain type. This is a part of the file structdb.desktop after variant 2:
[Desktop Entry]
Version=1.0
Name=StructDB				' Program-Name
…
Exec=/usr/bin/StructDB			' Program-Path
Icon=/usr/share/pixmaps/structdb.png	        	' Path to the program-icon
Terminal=false
Type=Application
StartupNotify=true
Categories=Office;				' Menu entry
MimeType=application/x-structdb	 	' Program-specific MIME type
11.10.1.7 Step 7 - Extra dependencies
There is a (fictitious) extra dependency for the StructDB project. It is assumed that the program StructDB calls the HTML editor BlueFish to edit a specific HTML file. The program would not work if this editor is not installed on the target computer. You must therefore make sure that the HTML editor BlueFish is installed during the installation of the installation package if it has not yet been installed.
You have to add this information to the installation package in the extra dependencies. That's exactly what this 7th step is all about. If necessary, you can also enter the required version numbers (min/max).
Figure 11.10.1.7.1: Step 7 - Determination of extra dependencies
These scenarios are possible:
- The editor BlueFish is installed on the target computer in the specified (minimum) version. Then this extra dependency is resolved.
- The editor BlueFish is not installed on the target computer. The editor is then automatically installed if a suitable package source exists on the target computer. This has always been the case with all tests under MINT 17.1.
- If the Debian installer can't resolve the extra dependency, you will be notified and a solution will be offered that has always worked.
11.10.1.8. step - Additional files
In this step, for example, you can specify files that can only be read by all system users. You can only select the files individually with 'Add' (a Multi-Select is not available) located in the logical “Project” directory. As the target folder, specify a folder in which normal system users can only read and the files are protected from write access.
Figure 11.10.1.8.1: Step 8 - Additional files
If you have decided to create and register your own MIME type on the target computer, Chapter 11.10.0.11 (variant 2) and had also entered the MIME type in step 6, you must enter the necessary information here in step 8 how to define the new MIME type for database files that are created locally with the program StructDB. Files with the extension *.sdb are to be assigned to the new MIME type and are to be provided with a file symbol as well as the assignment to the standard application StructDB so that the program opens, the data records are read from the file and displayed after a double-click on the file symbol. First, an XML file with the description of the MIME type (mime-type), the file extension (glob pattern) and the file icon (icon name) is required.
The content of the (tested) structdb.xml file follows the specifications on www.freedesktop.org:
<?xml version="1.0" encoding="UTF-8"?>
<mime-info xmlns="http://www.freedesktop.org/standards/shared-mime-info">
  <mime-type type="application/x-structdb">
    <comment xml:lang="de">StructDB Projekt</comment>
    <comment xml:lang="en">StructDB Project</comment>
    <comment xml:lang="es">Proyecto StructDB</comment>
    <comment xml:lang="fr">StructDB projet</comment>
    <comment xml:lang="nl">StructDB Project</comment>
    <glob pattern="*.sdb" />
    <icon name="structdb_dfi" />
  </mime-type>
</mime-info>
Many thanks to Willy Raets (Netherlands - http://howtogambas.org), who provided a sample XML file from one of his projects.
The XML file to be copied and the icon file must be selected (…) and entered in step 8 of the Packer Wizard:
Figure 11.10.1.8.2: Step 8 - Packer Wizard
These are the default directories for the XML file and the icon file on the target computer:
/usr/share/mime/packages/
/usr/share/icons/
Both the XML file and the symbol file must be located in the physical. hidden folder in the project folder, which corresponds to the logical folder 'Project' in the IDE. You can also copy both files to sub-folders such as XML and Icon, Figure 11.10.1.8.2.
11.10.1.9 Step 9 - target directory
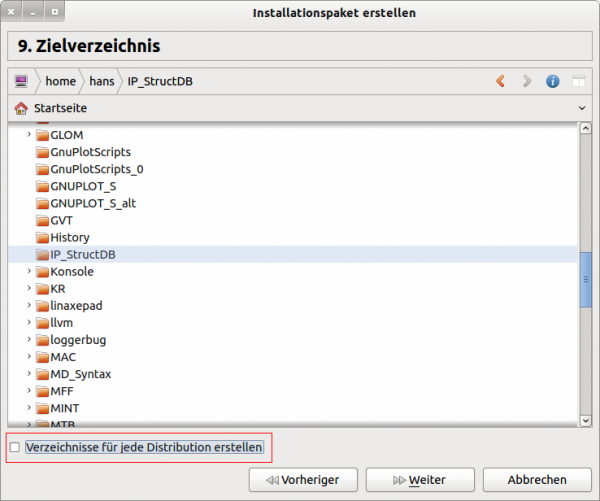
In this step, select a folder on the development computer where the Packer Wizard will save and back up all the files of the installation package, or create this folder using the context menu. The option (marked in red) can only be activated if you have specified several target distributions in step 3.
Figure 11.10.1.9.1: Step 9 - Define target directory
11.10.1.10. Step 10 - Create Package
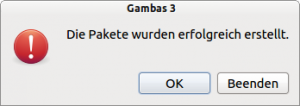
Now it's getting serious. Press OK to move the creation of the installation package to step 10. This process takes a little time. If the creation of all files in the installation package has been successfully completed, you will be notified:
Figure 11.10.1.10.1: Step 10 - The installation package has been successfully tied up
Afterwards, you will find these files in your IP_StructDB (export) folder in your home directory named in the dialog:
Figure 11.10.1.10.2: Contents of the installation package
Under Ubuntu or MINT, you can view the structured contents of the deb file by right-clicking on the deb file and selecting “Open with archive management” or, under MINT, the entry “Open with archive manager” in the context menu that opens. Take your time and take a look at the structure of the installation package. Read through the contents of the numerous files!
Pay attention:
- No folder in the project folder may have the same name as the project folder itself, because then the generation of an installation package fails.
- If you want to give your own component (!) an icon that is to be displayed in the development environment, you have to save the icon in the project folder in png format in the hidden folder.hidden/control.


